
12 Caulking Mistakes That Ruin the Finish
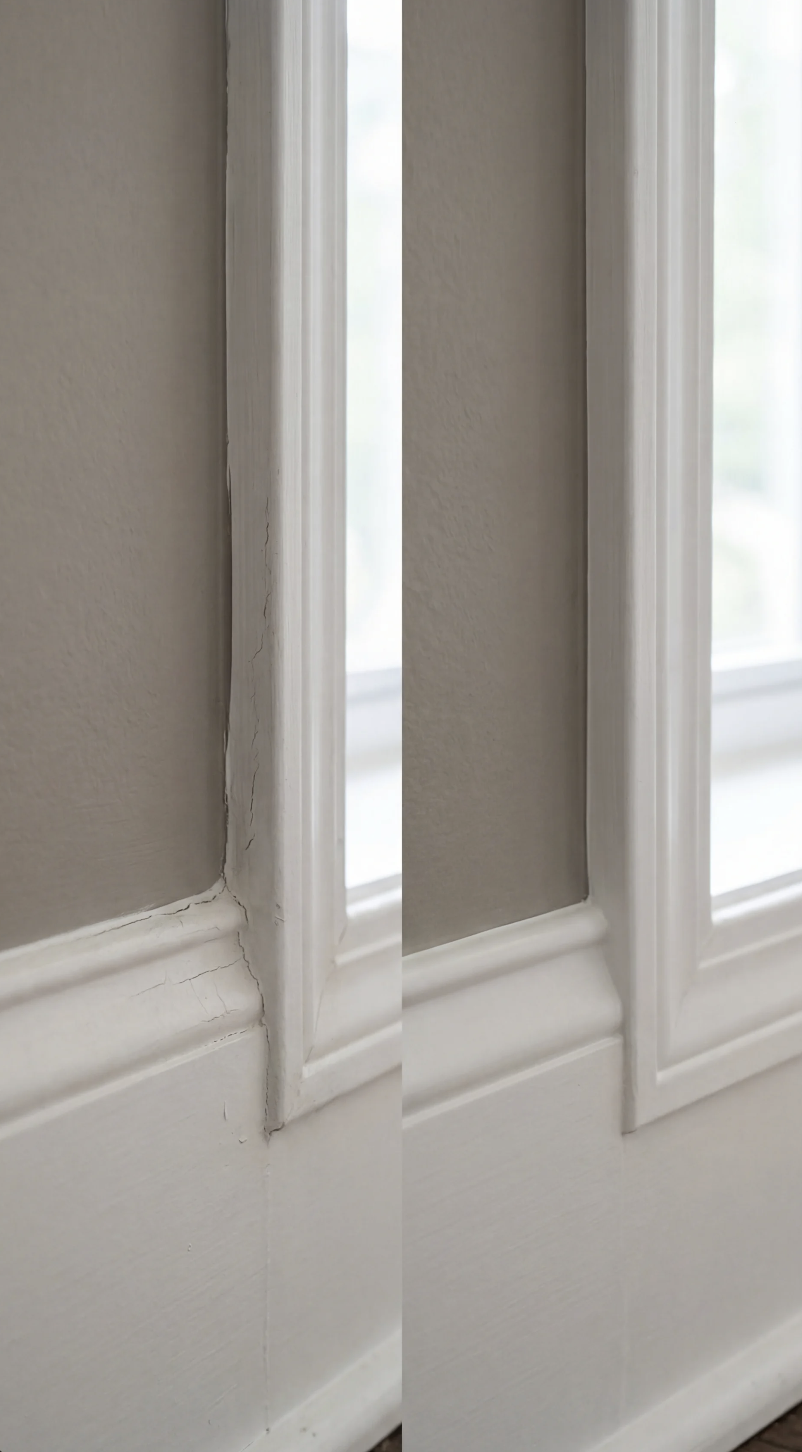
Caulking is one of those home tasks that looks simple until you actually do it. In theory, it’s just squeezing a bead into a gap. In reality, it’s often the difference between something looking clean and finished or sloppy and rushed. A bad caulking job draws your eye immediately. A good one disappears completely.
The frustrating part is that most caulking mistakes are not about skill. They are about timing, preparation, and using the wrong materials in the wrong places. If your caulking never looks quite right, chances are you are making one (or more) of these common mistakes.
1. Using the Wrong Type of Caulk for the Job
Not all caulk is the same, and this is where many projects go off the rails before they even start. Latex caulk, silicone, hybrid sealants, paintable caulk, bathroom caulk — they all exist for a reason. Using general-purpose caulk in a shower or around a tub is a recipe for failure. It may look fine at first, but it will crack, peel, or grow mildew quickly.
In wet areas, a high-quality bathroom silicone or a hybrid sealant designed for moisture is worth using. Around trim and baseboards, paintable acrylic latex caulk makes more sense. Choosing the right product upfront saves you from redoing the job later.
2. Skipping Surface Prep Because “It Looks Clean Enough”
Caulk does not stick well to dirt, dust, grease, or old residue. One of the most common mistakes is applying new caulk over surfaces that look clean but still have soap film, oils, or remnants of old caulk. Even tiny amounts of residue can prevent proper adhesion. Wiping the area with a mild cleaner or rubbing alcohol and letting it dry completely makes a noticeable difference. Removing old caulk fully with a caulk removal tool before reapplying also helps the new bead bond correctly. Prep is not exciting, but it is where good caulking starts.
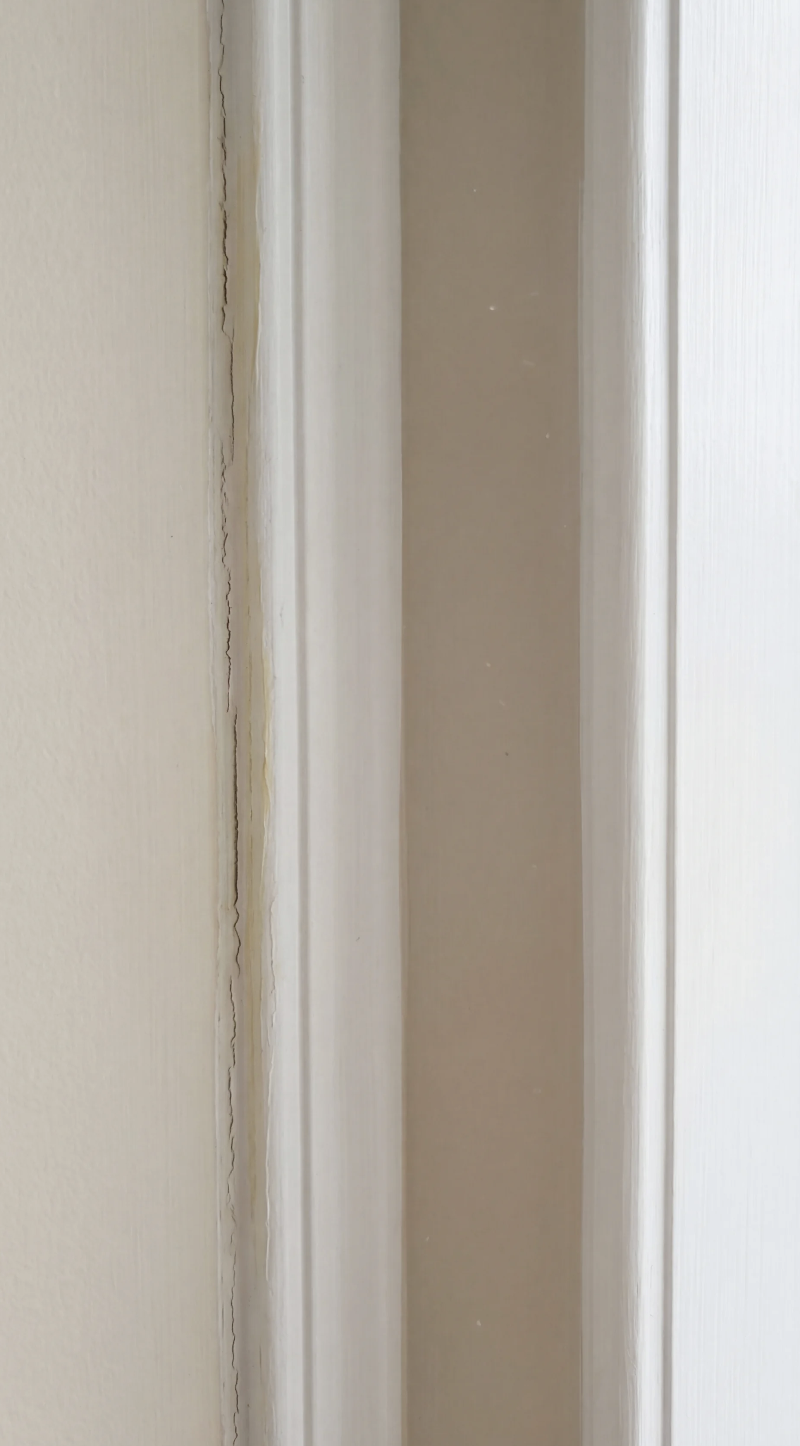
3. Applying Caulk Over Old, Failed Caulk
Caulk does not bond well to itself once it has cured. Layering new caulk over cracked or peeling old caulk almost always leads to uneven lines and premature failure. The new caulk may stick temporarily, but it will pull away as the underlying layer continues to fail. Taking a few minutes to remove old caulk with a scraper or removal tool creates a clean surface that allows the new bead to do its job properly.
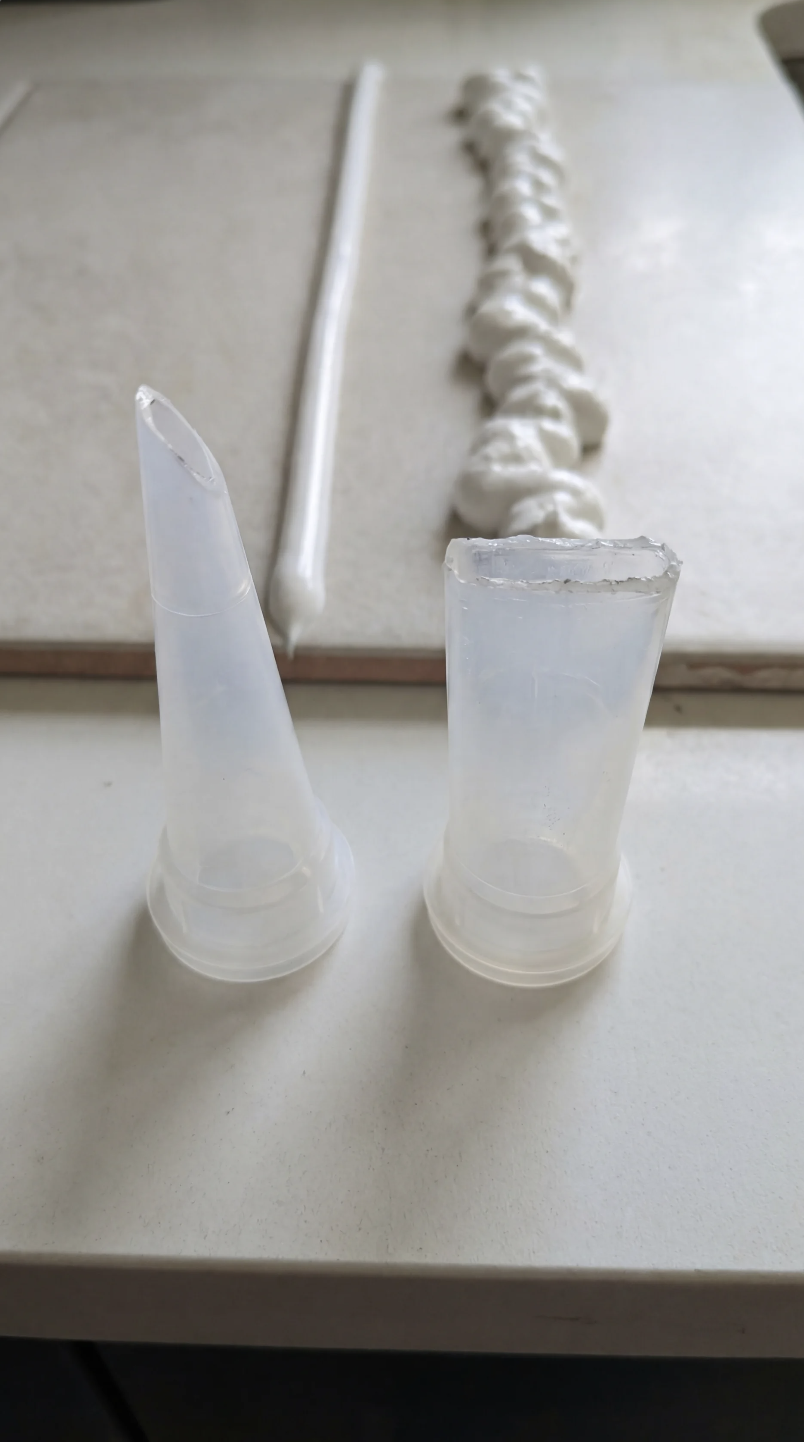
4. Cutting the Caulk Tube Tip Too Large
This is a subtle mistake that causes big problems.
Cutting the nozzle opening too wide releases too much caulk at once. That makes it harder to control, harder to smooth, and more likely to smear outside the joint. A smaller opening gives you more control and cleaner lines. You can always cut the tip slightly larger if needed, but once it’s too big, there’s no going back. Many professionals cut the tip at a shallow angle and start smaller than they think they need.
5. Applying Too Much Caulk
More caulk does not mean better sealing. Overfilling joints leads to thick, uneven beads that are difficult to smooth and take longer to cure. Excess caulk also tends to smear onto adjacent surfaces, especially on tile or trim. A clean caulk line fills the gap without overflowing it. The goal is coverage, not volume. If you find yourself wiping away large amounts of excess caulk, you are probably using too much.
6. Skipping Backer Rod in Large Gaps
Caulk is not meant to fill deep or wide gaps on its own. In larger joints, caulk should only bond to the sides of the joint, not the back. When it bonds on all sides, it cannot flex properly and is more likely to crack. This is where foam backer rod comes in. Pressing backer rod into deeper gaps before caulking reduces the amount of caulk needed and allows it to flex correctly. It is a small, inexpensive step that dramatically improves durability.
7. Not Smoothing the Bead Correctly
Leaving a caulk bead unsmoothed or poorly smoothed is one of the fastest ways to ruin the finish. Some people rely on their finger alone, which can work, but it often introduces inconsistencies. Others overwork the bead, dragging caulk out of the joint. Using a simple caulking tool or smoothing tool creates consistent pressure and a uniform finish. A light mist of water or a dedicated smoothing spray can help prevent sticking. The key is one smooth, confident pass, not repeated adjustments.
8. Caulking When the Area Is Too Cold or Too Humid
Environmental conditions matter more than people realize. Caulking in cold temperatures can prevent proper curing and adhesion. Excessive humidity can slow curing and trap moisture behind the bead, especially in bathrooms. Most caulk products list ideal temperature and humidity ranges on the tube. Following those guidelines helps ensure the caulk cures evenly and lasts longer. This is especially important for exterior caulking jobs.
9. Painting Too Soon After Caulking
Paintable caulk still needs time to cure. Painting over caulk too quickly can cause cracking, shrinking, or visible lines as the caulk continues to dry under the paint. This often shows up as uneven paint lines or shadowing. Waiting the recommended curing time before painting allows the caulk to fully settle and creates a smoother final finish. Patience here pays off visually.
10. Caulking Areas That Should Not Be Caulked
More caulk is not always better. Certain areas, like the inside edge of shower door frames or weep holes in windows, are designed to allow water to drain. Caulking these areas traps moisture and can cause leaks or damage elsewhere. Understanding where caulk belongs — and where it does not — is part of doing the job right. When in doubt, observe how water flows and drains before sealing anything permanently.
11. Using Cheap Caulk to Save a Few Dollars
Caulk is not the place to cut corners. Low-quality caulk shrinks more, cracks sooner, and is harder to apply cleanly. Saving a few dollars on the tube often leads to redoing the job much sooner than expected. A higher-quality caulk applies more smoothly, cures more predictably, and lasts longer. The difference is noticeable both during application and years later.
12. Rushing the Job Because “It’s Just Caulk”
This might be the biggest mistake of all. Caulking is often treated as an afterthought, something to rush through at the end of a project. But it is one of the most visible finishing details in a home. Taking your time, working in good conditions, and focusing on clean lines turns caulking from a frustration into a satisfying final step. A good caulk job quietly makes everything else look better.
Final Thoughts
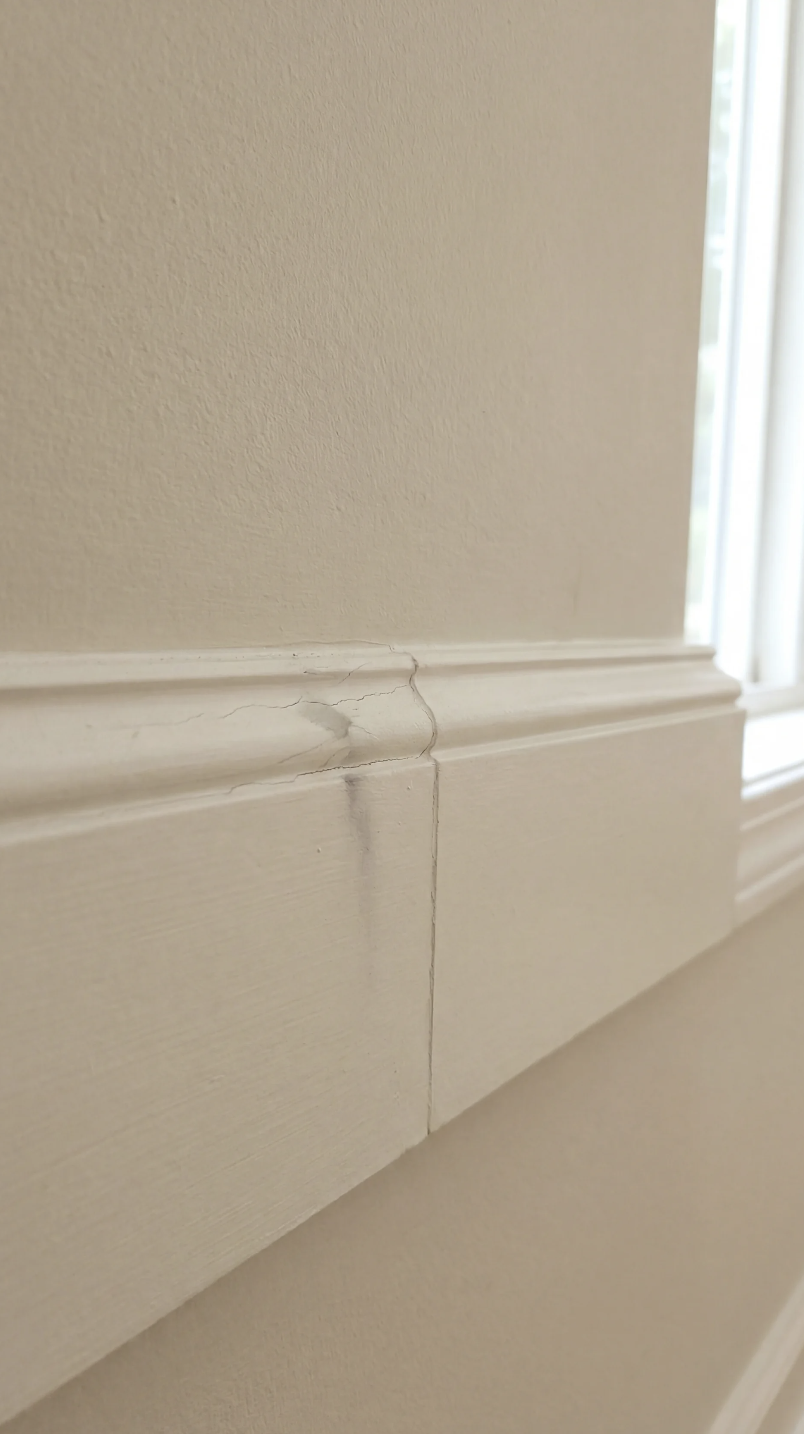
Caulking is not about squeezing product into gaps. It is about preparation, control, and understanding how materials behave over time.
Most caulking failures are not dramatic. They are subtle. Cracks. Gaps. Uneven lines. Small things that add up and make a space feel unfinished. Avoiding these common mistakes transforms caulking from a chore into a skill you can rely on again and again. And once you get it right, it becomes one of those home skills you really do use forever.